As photographers, we’re constantly collecting information. Favorite portrait spots, venues we’ve worked before, hidden gems we want to revisit. The problem is that information often lives everywhere. Phone notes, Instagram saves, old galleries, emails, or just memory.
One free, often overlooked tool can bring all of that together in one visual, searchable place. Google My Maps.
Google My Maps allows you to create custom, private maps layered with pins, notes, photos, and categories. For photographers, it can become a living location library that saves time, improves planning, and elevates client experience.
What Is Google My Maps (and Why Photographers Should Care)
Google My Maps is a customizable mapping tool separate from standard Google Maps. Unlike dropping a quick pin and forgetting it, My Maps lets you:
- Create multiple custom maps
- Add detailed notes to each location
- Upload reference photos
- Color-code or layer different types of locations
- Share maps with clients, assistants, or second photographers
Think of it as a visual database for your photographic brain.

Practical Ways Photographers Can Use Google My Maps
1. Photoshoot Location Libraries
Create a map dedicated to portrait locations. Each pin might include:
- Notes on time of day for best light
- Parking information
- Permit requirements
- Seasonal considerations
- Sample images from past sessions
Over time, this becomes invaluable for planning sessions quickly and confidently.
2. Wedding Venue Tracking
Build a separate map for wedding venues you’ve photographed or scouted.
- Color-code venues you’ve shot vs. ones you want to work at
- Create layers based on county or regional areas
- Add notes on ceremony flow, lighting challenges, or rain backup options
- Include reminders like “sunset portraits work best on the west lawn”
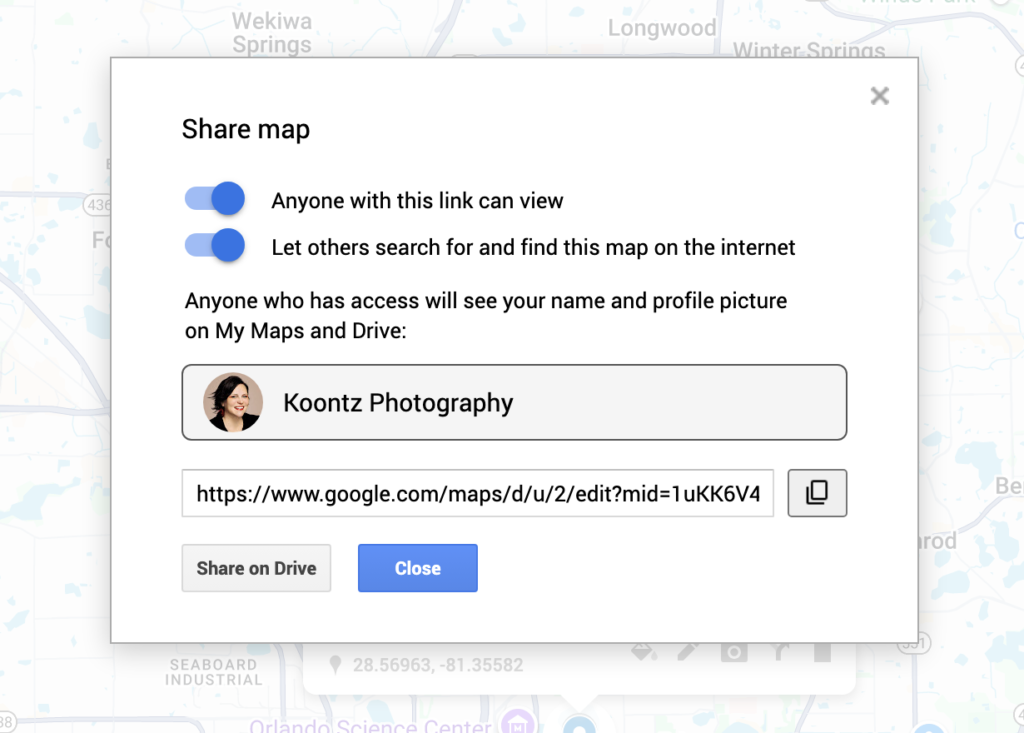
- Easily embed the map onto your website so that clients can view it anytime
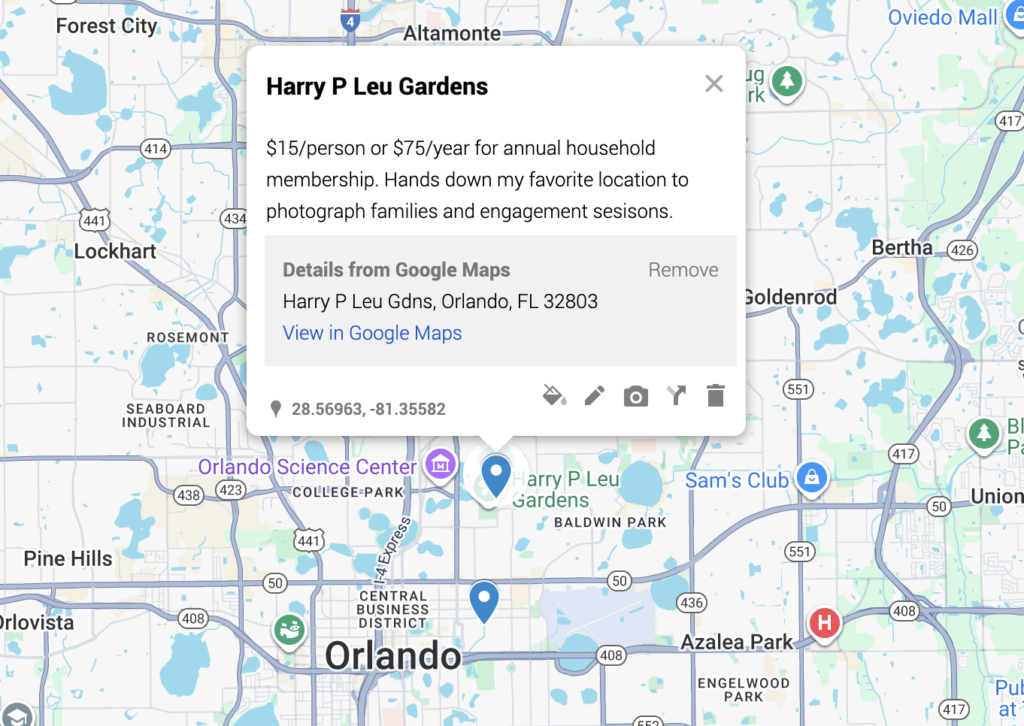
When a couple asks, “Have you worked here before?” you have instant clarity. For example, here is my venue map for the state of Florida. The one drawback I’ve found is that the layers are limited, so I cannot make one for every county. Screenshot of my website below so that you can see how it looks on my website. Embedding one into yours is super quick and easy!
3. Scouting and Travel Planning
For destination shoots, styled shoots, or road-trip sessions, My Maps helps you:
- Plan routes efficiently
- Mark potential stops and backup locations
- Keep everything in one place instead of multiple apps
- Keeps your notes about how much a location costs
This is especially helpful for photographers who travel frequently or work across multiple cities.
4. Client Experience Enhancement
You can share a read-only version of a custom map with clients:
- Suggested engagement session spots
- Multiple portrait location options near their venue
- Clear visuals instead of long explanations
Clients feel more prepared, and it positions you as organized and thoughtful.
Pro Tips for Making My Maps Work Long-Term
- Use layers: Separate things by category or location
- Standardize your notes: Light direction, crowd levels, parking, permits
- Update after every shoot: Treat it like part of your workflow, not an afterthought
- Keep one “wishlist” map for locations you want to photograph someday
Why This Matters for Professional Photographers
Tools like Google My Maps don’t just save time; they reduce mental load, improve communication, and help you show up more prepared. Over years of using Google My Maps, this organizational step will compound into smoother workflows and better client experiences.
And the best part? It’s free, customizable, and already integrated into tools most of us use daily! This kind of system thinking is exactly what helps photographers grow sustainably. It’s not about gear or trends. It’s about building workflows that support creativity, consistency, and professionalism.